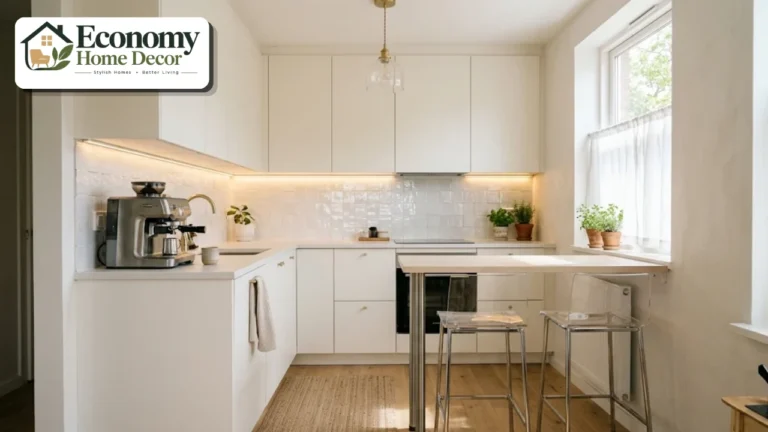
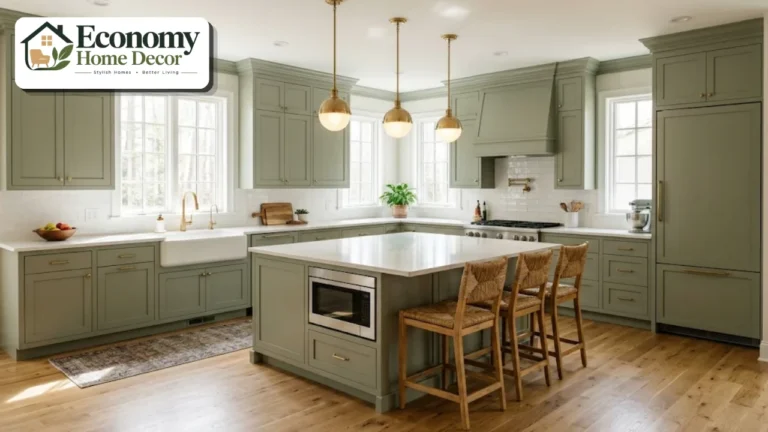
You open the fridge, turn around, and someone is standing exactly where you need to be. The pan is on the stove, but the spatula is in a drawer on the other side of the room. The dishwasher door blocks the cabinet with the plates. Sound familiar?
None of these problems come from a lack of money or a small room. They come from layout. A functional kitchen layout places everything where you naturally reach for it,
keeps people from bumping into each other and makes everyday cooking feel easy instead of tiring.
The good news is that you don’t need a huge kitchen to get it right. Some of the best-working kitchens are compact, carefully planned rooms where every step has a purpose.
This guide explains what makes a kitchen layout functional, how to plan work zones and clearances, which layout shapes suit which rooms, and the practical details that turn a good-looking kitchen into one that genuinely works.
What Makes a Kitchen Layout Functional?
A functional kitchen is one that supports the way you cook, clean, and live, with as little wasted effort as possible. Looks matter, but function comes first.
Most well-planned kitchens share these qualities:
Short, logical paths between the fridge, sink,k and stove.
Enough counter space next to each main appliance.
Clear walkways so people can pass without squeezing.
Storage near the point of use, so items live where they’re needed.
No traffic through the cooking area, especially in busy households.
Good lighting on every work surface.
Proper ventilation to remove heat, steam, and smells.
Think of a functional kitchen layout as a routine made physical. If you can unload groceries, prep a meal, cook it,t and clean up without crisscrossing the room or opening doors into each other, your layout is working.
The Work Triangle: Still a Useful Starting Point
The kitchen work triangle connects the three busiest points in any kitchen: the sink, the stove and the fridge. It was developed in the 1940s at the University of Illinois School of Architecture, as researchers studied how to make home kitchens more efficient.
The classic guidelines suggest:
Each leg of the triangle should be between 4 and 9 feet.
The total of all three legs should be between 13 and 26 feet.
No major obstacle, such as a tall cabinet or island, should cut through a leg.
Household traffic shouldn’t flow through the triangle.
If the legs are too short, the kitchen feels cramped,d and there’s no room for counter space. If they’re too long, you walk back and forth all day.
The triangle still works well for one-cook kitchens. However, modern kitchens often have two cooks, an island, a microwave drawer, and a coffee station, so many designers now think in terms of work zones as well.
Plan Your Kitchen in Work Zones
Zone planning is the backbone of a functional kitchen layout. It groups the kitchen by task. Each zone holds the tools, food, and appliances needed for that job, so you rarely have to leave it.
The prep zone
This is where most of the work happens, so it needs the most uninterrupted counter space. Ideally,y it sits between the sink and the stove.
Store knives, cutting boards, mixing bowls, measuring cups,ups and spices here. A pull-out bin for food scraps keeps the surface clear.
The cooking zone
The stove, oven,ven and microwave belong in this zone. Keep pots, pans, utensils, oils and oven mitts within arm’s reach.
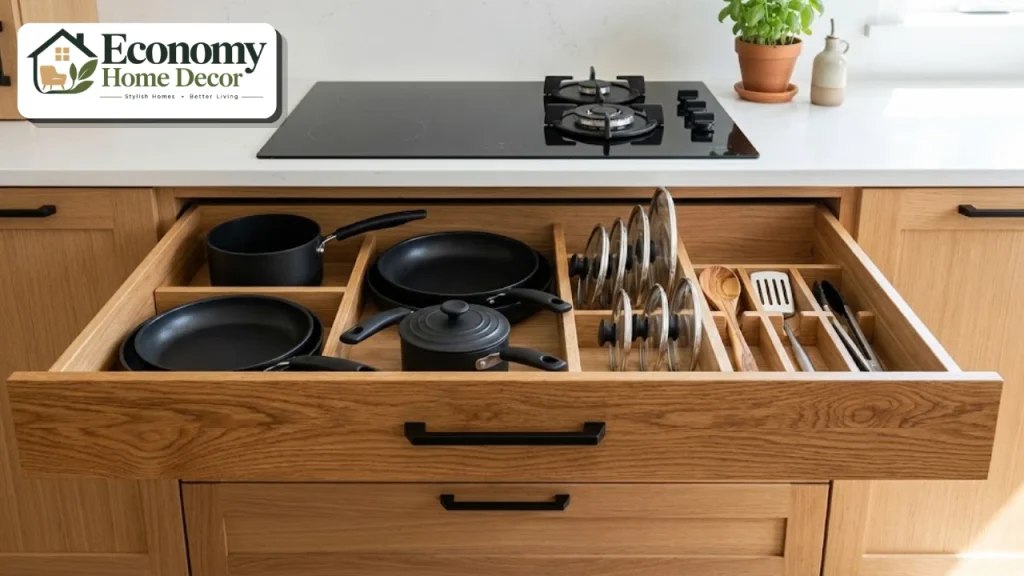
Leave counter space on both sides of the cooktop for setting down hot pans. Deep drawers beneath the cooktop hold pans better than shelves.
The cleaning zone
The sink, dishwasher, and waste bins work together. Place the dishwasher right next to the sink, so dirty dishes move in one short step.
Store dish soap, towels, and cleaning supplies under the sink, and keep everyday plates and glasses in a cabinet close to the dishwasher for fast unloading.
The storage zone
The fridge and pantry form the food storage zone. Position them near the entrance of the kitchen, so groceries can be unpacked without walking through the cooking area.
A counter next to the fridge gives you somewhere to put bags down.
The serving and social zone
In many homes, an island or peninsula doubles as a serving area, breakfast ba,r or homework spot. Keep this zone on the outside edge of the kitchen, so family and guests can gather without getting in the cook’s way.
Specialty zones
Depending on how you live, you might add a coffee or breakfast station, a baking center, or a beverage fridge for drinks. Placing these outside the main work area keeps traffic away from the cook.

Clearances That Keep a Kitchen Comfortable
Even a functional kitchen layout feels frustrating if the spaces between cabinets are too tight. These widely used guidelines, based on National Kitchen & Bath Association recommendations, help.
| Space | Recommended clearance |
|---|---|
| Work aisle for one cook | At least 42 inches |
| Work aisle for two cooks | At least 48 inches |
| Walkway outside the work area | At least 36 inches |
| Behind island seating (no one passing) | About 32 to 36 inches |
| Behind island seating (people passing) | About 44 inches or more |
| Landing space beside the fridge | About 15 inches |
| Landing space beside the cooktop | About 12 to 15 inches on each side |
Also check that appliance doors can open fully without hitting each other. A dishwasher that blocks the oven, or a fridge door that hits an island, makes a kitchen tiring to use every single day.
Counter Space: How Much Do You Need?
Counters are where most of the real work happens. A kitchen without enough of them feels cluttered no matter how many cabinets it has.
Plan at least one continuous run of 36 inches or more for food prep, ideally between the sink and the stove. Add landing space next to the fridge, cooktop, oven, and microwave, so there’s always somewhere to set things down.
If you bake often, a lower or wider counter section helps with rolling dough. If you have small appliances you use daily, plan a dedicated spot for them so they don’t crowd the prep area.
Choosing the Right Layout Shape
The shape of your kitchen sets the foundation. Each layout has strengths, and the best one depends on your room size, budget,t and how you cook.
One-wall kitchen
All cabinets and appliances line a single wall. It’s simple, affordable, and perfect for studios, apartments, and open-plan spaces.
To make it more functional, place the sink in the middle with the fridge at one end and the stove at the other. Add tall cabinets for storage and a movable island or cart if you need extra prep space.
Galley kitchen
Two parallel runs of cabinets face each other across an aisle. Professional chefs often love galley kitchens because everything is only a step or a turn away.
Keep the aisle at around 42 to 48 inches. Put the sink and stove on one side and the fridge on the other, and avoid making the galley a through-route if possible.
L-shaped kitchen
Cabinets run along two adjoining walls, forming an L. It’s one of the most flexible layouts and works well in small and medium kitchens.
The L naturally creates a work triangle and leaves the rest of the room open for a table or island. Use corner carousels or blind-corner pull-outs to make the corner cabinet useful.
U-shaped kitchen
Cabinets wrap three walls, giving plenty of storage and counter space. It suits keen cooks and larger households.
Make sure the space inside the U is at least 42 inches wide, ideally more, so two people can work comfortably.
Island kitchen
An island adds a freestanding work surface, usually alongside an L-shaped or one-wall kitchen. It can hold the sink, a cooktop, storage, or seating.
Islands are only functional if there’s enough room around them. Leave at least 42 inches on working sides, and don’t make the island so large that people must walk all the way around it.
Peninsula kitchen
A peninsula is attached to the wall or cabinets at one end. It gives many of the benefits of an island in a smaller footprint and helps separate the kitchen from a dining room or living area.
Comparing Kitchen Layouts at a Glance
| Layout | Best room size | Storage | Two cooks? | Functional strength |
|---|---|---|---|---|
| One-wall | Small or open-plan | Low to medium | Difficult | Simple and space-saving |
| Galley | Narrow | Medium | With a wide aisle | Very efficient steps |
| L-shaped | Small to medium | Medium | Yes | Flexible and open |
| U-shaped | Medium to large | High | Yes | Maximum counter space |
| Island | Large | High | Yes | Extra prep and seating |
| Peninsula | Medium | High | Yes | Island benefits in less space |
12 Ideas for a More Functional Kitchen Layout
Once the basic shape is set, these ideas turn it into a functional kitchen layout that works better every day.
Put the sink in the center of the action
The sink is the most-used spot in most kitchens. Placing it between the stove and the fridge, with prep space on either side, keeps your daily routine short and simple.
Keep the dishwasher next to the sink
A dishwasher right beside the sink means rinsed dishes move straight in. If you’re right-handed, many people find it easier to have the dishwasher on the right; left-handed cooks often prefer the left.
Store things where you use them
Pots near the stove, plates near the dishwasher, spices near the prep area, and mugs near the coffee machine. This simple rule cuts more wasted steps than almost any other change.
Choose drawers over cupboards for base cabinets
Deep drawers let you see and reach everything without kneeling. They’re ideal for pots, pans, plates,s and even pantry food.
Use the full height of the room
Tall pantry cabinets and upper cabinets that reach the ceiling add a surprising amount of storage. Keep rarely used items up high and everyday ones between hip and shoulder height.
Plan a landing zone by the entrance
A small stretch of counter near the door gives you somewhere to drop keys, ma,il and shopping bags. It stops clutter from landing on your prep area.
Add a pull-out waste and recycling station

Place it under or beside the sink or prep area. Separate bins for trash, recycling, and compost make cleanup faster and keep the counter clear.
Create a coffee or breakfast station
Group the coffee maker, kettle, toaster, mugs and cereal in one spot outside the main work triangle. Family members can make breakfast without getting in the cook’s way.
Layer your lighting
Combine ceiling lights for general light, under-cabinet lights for tasks, and pendants over an island. Good task lighting makes chopping safer and helps you see what you’re cooking.
Ventilate properly
A range hood vented to the outside removes smoke, steam, grease,e and smells. Choose one at least as wide as your cooktop and check its noise level before buying.
Plan outlets where you’ll need them
Put outlets along every stretch of counter, on the island,d and inside an appliance garage. That way, small appliances can be used and stored without long cords across the counter.
Pick easy-clean surfaces
Quartz counters, a smooth backsplash and a durable floor make daily cleaning quick. The same thinking used in our guide to bathroom design floor ideas applies here: choose water-resistant, slip-resistant materials that hold up to spills.
Functional Kitchen Layout Ideas for Small Spaces
A small kitchen can be one of the most efficient rooms in the house, as long as every inch has a job.
Choose a galley, L-shaped,ed or one-wall layout to save space.
Go vertical with tall cabinets, open shelves and wall rails.
Pick slim or compact appliances, such as an 18-inch dishwasher or a counter-depth fridge.
Use a rolling cart that adds prep space and moves out of the way.
Install pull-outs and drawer dividers so nothing is wasted.
Keep the palette light to make the room feel larger.
For more ideas, browse our small apartment ideas and our small-space solutions section.
Making an Open-Plan Kitchen Work
Open-plan kitchens bring extra challenges. Everything is visible, and noise and smells travel into the living area.
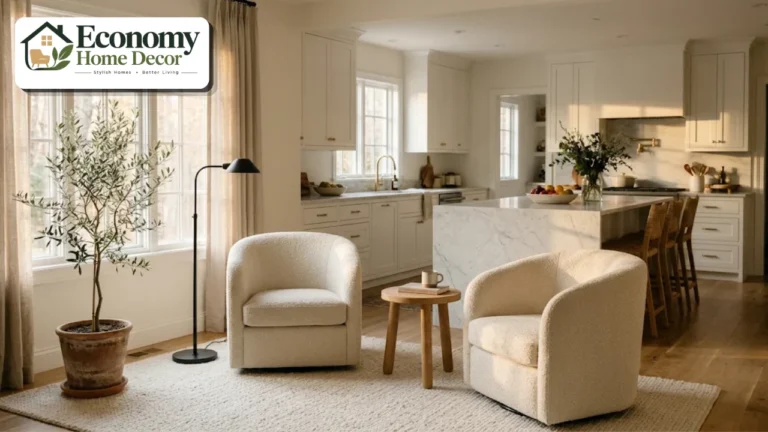
To keep an open kitchen functional, face the island toward the living space so the cook can join conversations, but keep the main work triangle away from through-traffic.
Plan plenty of closed storage to hide clutter, choose a quiet dishwasher and range hood, and coordinate finishes with your living room so the whole space feels connected.
Three Real-World Examples
These everyday situations show how the principles adapt to different homes.
A narrow apartment kitchen
The room is about 8 feet wide. A galley layout puts the sink and stove on one side and a tall fridge and pantry on the other, with a 42-inch aisle between them.
A wall rail holds utensils, and a slim rolling cart slides out for extra prep space when needed.
A busy family kitchen
An L-shaped kitchen runs along two walls, with an island in the middle. The prep zone sits between the sink and stove, while the island’s far side has stools for breakfast and homework.
A coffee station near the entrance keeps morning traffic out of the cooking area.
A two-cook kitchen
A U-shaped kitchen with a 48-inch aisle gives two people room to work. A second small prep sink on the island lets one person wash vegetables while the other cooks.
Each cook has their own stretch of counter, so they never block each other.
Matching Function With Style
A functional layout can carry any style. Once the plan is set, choose finishes that suit your home.
Modern: flat-panel cabinets and integrated appliances. See our modern home decor ideas.
Farmhouse: Shaker cabinets, a large farmhouse sink,k and open shelves. Explore our farmhouse decor guide.
Scandinavian: light wood, white walls, and simple lines. Our Scandinavian style section shows how.
Minimalist: handleless cabinets and hidden storage. Find more in our minimalist interiors guide.
Luxury: a generous island, stone counters and statement pendants. See our luxury interiors ideas.
How to Plan a Functional Kitchen Layout Step by Step
Measure everything. Walls, windows, doors, ceiling height,t and the location of plumbing, gas, and electrical points.
List how you use the kitchen. How often you cook, how many cooks, whether you bake, entertain,n or eat at the counter.
Choose the layout shape that fits the room.
Place the sink first, since it’s tied to plumbing and often a window.
Position the stove and fridge to form a comfortable triangle.
Map out the work zones and the storage each one needs.
Check every clearance, including appliance doors and island seating.
Plan lighting, outlets, and ventilation before choosing finishes.
Draw it to scale on graph paper or a free online planner.
Walk through a typical day on paper, from making breakfast to cleaning up after dinner.
That last step is where you spot problems, such as a fridge door that blocks the pantry or a bin that’s too far from the prep area, while they’re still free to fix.
A Functional Kitchen Layout on a Budget
You don’t need a full remodel to make a kitchen work better.
| Improvement | Budget version | Bigger investment |
|---|---|---|
| Storage | Drawer organizers and shelf risers | Deep drawers and pull-out pantry |
| Prep space | Rolling cart or butcher-block table | New island or longer counter run |
| Lighting | Plug-in under-cabinet LED strips | Hardwired task and pendant lighting |
| Waste | Freestanding sorting bins | Built-in pull-out bin cabinet |
| Layout | Rearrange what’s stored where | Move appliances or plumbing |
Simply reorganizing your cabinets by zone can make a huge difference at almost no cost. For more money-saving ideas, see our guide to budget-friendly decorating.
Common Kitchen Layout Mistakes to Avoid
Too little prep space. The area between the sink and stove is the most important counter in the room.
Aisles that are too narrow or too wide. Under 42 inches feels cramped; much over 48 inches adds wasted steps.
Appliance doors that collide. Check every door and drawer swing on paper.
An oversized island. It blocks movement and makes you walk further.
Traffic through the work area. Keep the fridge and snacks near the edge of the kitchen.
Forgetting the bins. Waste should be close to the sink and prep area.
Too few outlets. Small appliances end up with cords stretched across the counter.
Poor lighting. A single ceiling light casts shadows exactly where you work.

FAQs:
What is the most functional kitchen layout?
There’s no single best layout, but L-shaped and galley kitchens are often considered the most efficient. They keep the sink, stove, and fridge close together with short, logical paths between them.
Is the kitchen work triangle still relevant?
Yes, as a starting point. The triangle works well for one-cook kitchens. Many designers now combine it with work zones to suit two cooks, islands,s and extra appliances.
How wide should a kitchen aisle be?
Common guidelines suggest at least 42 inches for one cook and 48 inches for two. Walkways outside the work area should be at least 36 inches wide.
Where should the fridge go in a kitchen?
Place the fridge near the edge of the kitchen, close to the entrance. Family members can grab drinks and snacks without walking through the cooking area, and groceries can be unpacked easily.
How do I make a small kitchen more functional?
Use vertical storage, compact appliances, deep drawers,rs and a rolling cart for extra prep space. Store items where you use them and keep counters clear.
Should the sink or stove go on the island?
Both can work. A sink on the island keeps the cook facing the room but needs plumbing. A cooktop on the island needs good ventilation. Many people keep the stove on a wall and use the island for prep and seating.
How much counter space does a functional kitchen need?
Aim for at least one continuous prep area of 36 inches or more, plus landing space beside the fridge, cooktop, and sink.
What is the difference between a work triangle and work zones?
The work triangle links the sink, stove, and fridge. Work zones group the kitchen by task, such as prep, cooking, cleaning, and storage, which suits modern kitchens with more appliances and more than one cook.
Can I improve my kitchen layout without remodeling?
Yes. Reorganize storage by zone, add drawer organizers, use a rolling cart, add under-cabinet lighting, and move small appliances to a dedicated station.